Showing posts with label dessert. Show all posts

Monday, February 13, 2012

Cherry Berry Streusel Pie

I have wanted to make this pie for awhile and I finally got to it on Sunday. My son gave this two thumbs “way past up.” My kids are usually not big fans of pie, but they gobbled this up and when given the choice between cookies and pie, the two older ones chose pie. I was shocked because my cookies were pretty good too. A couple of notes on this recipe. It calls for a deep dish pie plate, which I didn't notice until I was too far into it to turn back. I simply didn't put as much filling in and it was still great. Second, if you aren't comfortable with making a lattice-top I am not sure it's necessary. I think next time I'll try it with just the streusel on top and cut the pie crust in half. It looked pretty though, until I tried to cut into it and it all fell apart. I also didn't find it necessary to chill the dough. It was really easy to work with. You can toast your pecans in a frying pan on the stove, just keep an eye on them, they toast quickly. Lastly, don't forget to put a pan on the rack under your pie while it's baking to catch any spills. Serve with a lovely scoop of vanilla ice cream. Let me know if you like it too! By the way, my pie was pretty but it didn't look anything like the picture below.  That's amazing, although maybe easier than lattice top. 
Cherry-Berry Streusel Pie
Cherry-Berry Streusel Pie RecipePrep Time: 30 minutes + chilling
Cook Time: 55-65 minutes
Yield: 8 servings

Ingredients:
2½ c. all-purpose flour
1 T. sugar
1 t. salt
1 c. cold butter
7-8 T. cold water

FILLING:
2 can (21 oz. Each) cherry pie filling
1 c. fresh or frozen raspberries
¼ c. packed brown sugar
¼ t. ground cinnamon

TOPPING:
1 c. yellow cake mix
½ c. chopped pecans, toasted
½ c. flaked coconut
¼ c. butter, melted
2 T. 2% milk
2 T. sugar

Directions: Place the flour, sugar and salt in a food processor; cover and pulse until blended. Add butter; cover and pulse until mixture resembles coarse crumbs. While processing, gradually add water until dough forms a ball.

Divide dough in half so that one portion is slightly larger than the other; wrap each in plastic wrap. Refrigerate for 30 minutes or until easy to handle.

On a lightly floured surface, roll out larger portion of dough to fit a 9-in. Deep-dish pie plate. Transfer pastry to pie plate; trim pastry to ½ inch beyond edge of plate. Combine the filling ingredients; spoon into crust. Sprinkle with dry cake mix, pecans and coconut. Drizzle with butter.

Roll out remaining pastry to a 13-inch circle; cut into strips for a lattice top. While creating the lattice top, twist the pastry strips for a decorative effect. Seal and flute edges of pie.

Brush lattice top with milk; sprinkle with sugar. Cover edges loosely with foil. Bake at 375° for 55-65 minutes or until crust is golden brown and filling is bubbly.


The recipe and photo are originally from tasteofhome.com and Taste of Home magazine

Friday, February 10, 2012

Oatmeal Butterscotch Bars

These buttery bars are sweet and chewy. They remind me of the butterscotch delights (cookies) that my mom used to make for us. They have a lot of butterscotch flavor. They are also better the day you make them, they don't last long. When you're making the glaze don't make it before the bars come out of the oven. It gets hard really fast and I ended up having to frost the bars instead of drizzling. So they weren't real pretty but that didn't stop me from eating half the pan. ENJOY!

Oatmeal Butterscotch Bars
Prep Time: 20 minutes
Cook Time: 17-19 minutes + cooling
Yield: 36 bars – They must cut them much smaller than I do.

Ingredients:
BARS:
1¼ c. all-purpose flour
2 c. quick-cooking oats
½ t. baking soda
½ t. salt
16 T. unsalted butter (2 sticks), softened, each stick cut into 8 pieces
¾ c. butterscotch chips
1 c. packed dark brown sugar
2 t. vanilla extract
1 large egg

GLAZE:
2 T. dark brown sugar
1 T. water
1/8 t. salt
¼ c. butterscotch chips
Directions: FOR THE BARS: Adjust oven rack to middle position and heat oven to 350 degrees. Line 13 x 9 inch baking pan with aluminum foil, leaving overhang on all sides.
Mix flour, oats, baking soda,and salt in medium bowl until combined. Heat butter in small saucepan over medium-low heat until nutty brown in color, about 12 minutes. Pour hot butter over butterscotch chips in large bowl and whisk until smooth. Whisk in brown sugar until dissolved, then whisk in vanilla and egg until combined. Stir in flour mixture in two additions until combined.
Spread the mixture into prepared pan and bake until edges are golden brown and toothpick inserted in center comes out with a few crumbs attached, 17-19 minutes. Transfer pan to wire rack.
FOR THE GLAZE: Bring brown sugar, water, and salt to simmer in small saucepan. Pour hot sugar mixture over butterscotch chips in small bowl, whisking until smooth. Drizzle glaze over warm bars and allow to cool on rack until warm to touch, about 1½ hours. (They're house must be warmer than mine because mine were pretty cool after 30 minutes.) Using foil overhang, lift bars from pan and completely cool on rack, about 30 minutes. Cut into bars and serve.

This recipe is originally found on Cook's Country.com

Thursday, December 15, 2011

Elegant Chocolate Torte

My mouth waters with the memory of this cake.  I made it as a treat for my book club this spring and then again when I was visiting my parents this summer.  It is so good.  It takes a bit of work and a little planning but it is worth absolutely every minute.  It would be a perfect compliment to that fancy Christmas dinner I know you are all planning.  The custard part is a bit tricky and even my mom didn't get it right but it's so good you won't even care that you are eating tiny bits of scrambled egg amongst your custard filling.  I promise.  The frosting is super easy and fun to work with.  Savor every bite and you'll still want a second piece.  Have I sold you on this cake yet?
 
Elegant Chocolate Torte RecipeElegant Chocolate Torte
Prep Time: 30 minutes, plus cooling time for the custard and cake
Cook Time: 30-35 minutes for the cake, approximately 10 minutes for the custard
Yield: 16 servings (Um...I've never had it feed that many since everyone wants seconds)
 
Ingredients:
FILLING:
1/3 c. all-purpose flour
3 T. sugar
1 t. salt
1¾ c. milk
1 c. chocolate syrup
1 egg, lightly beaten
1 T. butter
1 t. vanilla extract
BATTER:
½ c. butter, softened
1¼ c. sugar
4 eggs
1 t. vanilla extract
1¼ c. all-purpose flour
1/3 c. baking cocoa
¾ t. baking soda
¼ t. salt
1½ c. chocolate syrup
½ c. water
FROSTING:
2 c. heavy whipping cream
¼ c. chocolate syrup
¼ t. vanilla extract
Directions: For filling, in a small saucepan, combine flour, sugar and salt.  Stir in milk and syrup until smooth.  Bring to a boil over medium heat, stirring constantly; cook and stir for 1-2 minutes or until thickened.  Remove from heat.  Stir a small amount of hot mixture into egg; return all to the pan, stirring constantly.  Bring to a gentle boil; cook and stir for 2 minutes.  Remove from heat; stir in butter and vanilla.  Cool to room temperature, stirring often. 
For cake: In a large mixing bowl, cream butter and sugar until light and fluffy.  Add eggs, one at a time, beating well after each. Stir in vanilla.  Combine dry ingredients; add to creamed mixture alternately with syrup and water.  Beat just until combined.  Pour into two greased and floured 9-inch round baking pans.  Bake at 350° for 30-35 minutes or until toothpick comes out clean.  Cool for 10 minutes; remove from pans to wire racks to cool.  Cut each cake in half horizontally.  Place one bottom layer on a serving plate; spread with a third of the filling.  Repeat layers twice.  Top with remaining cake.  In a  mixing bowl, beat frosting ingredients until stiff peaks form; spread or pipe over top and sides of cake.

The photo is from tasteofhome.com

Monday, December 12, 2011

Cranberry Apple Crisp

Apple crisp is one of my husband's favorite desserts.  I was a little reluctant to mess with it at all.  Somethings just don't need improvement.  But I found this recipe on Cooks Country (see I told you, obsessed) and thought it was the perfect time of year to throw cranberries into a crisp.  This isn't overly sweet, in fact it has a nice sweet-tart flavor.  The two different types of apples and two different styles of cranberries gives it a nice rounded out flavor and texture.  I would stay away from generic brands of dried cranberries.  I used the off brand from Walmart.  They were too dried out and so became a bit too chewy.  Again maybe it's just my oven, but it didn't seem quite cooked enough.  I like my apples a little softer, but maybe that's just a preference thing.  Test it after 30 minutes and see what you think.  I think I'll tack on another 10-15 minutes next time.  This smells fabulous as it cooks and there are make ahead directions (LOVE THAT).  Just give yourself enough time to peel, core, and slice 5 pounds of apples.  My apple peeler-corer-slicer and I don't have a good relationship and I did it all by hand.  It takes a long time.   Serve warm with vanilla ice cream and prepare to be comforted. 
 
Cranberry-Apple Crisp
Prep Time: 30 minutes-45 minutes (longer if you're dumb like me and are peeling by hand)
Cook Time: 30 minutes
Serves: 8-10 (those would have to be pretty generous portions)

Ingredients:
TOPPING:
¾ c. all-purpose flour
½ c. packed light brown sugar
½ c. granulated sugar
1 t. ground cinnamon
12 T. unsalted butter, cut into 1/2-inch pieces and chilled
¾ c. old-fashioned oats

FILLING:
1 pound cranberries, fresh or frozen (about 4 cups or 1½ bags of cranberries)
1¼ c. granulated sugar, divided
¼ c. water
2½ lbs Granny Smith apples (6-8 apples), peeled, cored, and cut into ½” pieces
2½ lbs. Braeburn apples (6-8 apples), peeled, cored and cut into ½” pieces (I used Fuji because I have an abundance of them)
1 c. sweetened dried cranberries
3 T. Minute Tapioca
Directions: FOR THE TOPPING: Adjust oven rack to middle position and heat oven to 400°.  Pulse flour, sugars, cinnamon, and butter in food processor until mixture has texture of coarse crumbs (some pea-sized pieces of butter will remain), about 12 one-second pulses.  Transfer to medium bowl, stir in oats, and use fingers to pinch topping into peanut-sized clumps.  Refrigerate while preparing filling.

FOR THE FILLING: Bring fresh cranberries, ¾ c. sugar, and water to simmer in a Dutch-oven (or a pretty good sized pot) over medium-high heat and cook until cranberries are completely softened and mixture is jam-like, about 10 minutes (a little longer if your cranberries are frozen).  Scrape into bowl.    Place in the dutch-oven the apples, remaining ½ c. of sugar, and dried cranberries, cook over medium-high heat until apples begin to release their juices, about 5 minutes.  Off heat, stir cranberry mixture and tapioca into apple mixture.  Pour into 9x13 pan set inside a rimmed baking sheet (to catch drips) and smooth surface evenly with spatula.  Scatter topping evenly over filling and bake until juices are bubbling and topping deep golden brown, about 30 minutes.  If topping is browning too quickly, loosely cover with aluminum foil.  Transfer to wire rack to cool.  Serve warm.

MAKE AHEAD:   After pinching the topping into small clumps in step 1, transfer the mixture to a zipper-lock bag and refrigerate for up to 5 days or freeze for up to a month.  The cooked filling can be refrigerated for up to 2 days.  To bake, sprinkle the chilled topping evenly over the chilled filling, loosely cover with foil, and bake for 20 minutes.  Uncover and bake until the juices are bubbling and the topping is deep golden brown, 15-20 minutes longer.    

Thursday, December 8, 2011

Homemade Peanut Butter Cups

My husband and I both love chocolate and peanut butter.  We both love Reese's peanut butter cups.  So I jumped on the chance to make my own.  I liked that the centers were so creamy.  The chocolate was perfect not too sweet and not too dark.  These are perfect for holiday gift giving.  I hope you love them too!
Homemade Peanut Butter Cups Recipe 
Homemade Peanut Butter Cups
Yield: 3 dozen
Prep Time: 15 minutes plus chilling


Ingredients:
1 c. creamy peanut butter, divided
4½ t. butter, softened
½ c. confectioners' sugar
½ t. salt
2 c. semisweet chocolate chips
4 milk chocolate candy bars (1.55 oz. Each), coarsely chopped
Colored sprinkles, optional
Directions: In a small bowl, combine ½ c. peanut butter, butter, confectioners' sugar and salt until smooth; set aside.  In a small microwaveable bowl, melt the chocolate chips, candy bars and remaining peanut butter; stir until smooth.  Drop teaspoonfuls of chocolate mixture into paper-lined miniature muffin cups.  (You could also use a candy mold if you have one.  Top each with a scant teaspoonful of peanut butter mixture; top with another teaspoonful of chocolate mixture. Decorate with sprinkles if desired.  Refrigerate until set.  Store in an airtight container. 


(This recipe and photo are originally from Taste of Home)

Friday, December 2, 2011

Chocolate Caramel Nut Bars

I found this recipe a couple of Christmases ago.  I couldn't stop snitching them from the freezer.  A lovely buttery shortbread crust topped with chocolate and caramels can't be anything but wonderful.  There's really nothing else to say, so let's eat!

Chocolate-Caramel Nut Bars recipe
Chocolate – Caramel Nut Bars
Prep Time: 20 minutes
Cook Time: 15 minutes
Chilling Time: 15 minutes
Yield: 36 bars or triangles

Ingredients:
1 c. butter, softened
½ c. packed brown sugar
2 c. flour
¼ t. salt
1 (12 oz.) pkg. Semi-sweet chocolate chunks or chips
1 bag of caramels (about 50)
¼ c. whipping cream
1 c. chopped walnuts or pecans
Directions: Preheat oven to 350°.  Line 15x10x1 inch baking pan with aluminum foil, with ends of foil extending over sides of pan.  Grease foil.  Beat butter and sugar in a large bowl with electric mixer on medium speed until light and fluffy.  Add flour and salt, beat on low speed until crumbly.  Press firmly into prepared pan.  Bake 15 minutes or until edges are golden brown; sprinkle with chocolate chunks/chips.  Cover with foil.  Let stand 5 minutes or until chocolate is melted; spread evenly over crust.  Refrigerate 15 minutes or until set.  Microwave caramels and cream on high for 2 minutes or until caramels beginning to melt; stir until caramels are completely melted.  Gently spread over chocolate layer.  Sprinkle with walnuts or pecans; press gently into caramel.  Cool.  Cut into 36 bars or triangles. 


This recipe was found in a Kraft Foods Magazine

Thursday, December 1, 2011

Pumpkin Praline Pie

Think pecan pie meets pumpkin pie.  Do you know what happens when they meet.  LOVE.  This recipe is a bit involved and to be honest I think the pie would be tasty even if you didn't follow all the persnickety steps.  But my crust was flaky and  it was not soggy, even after being in the fridge for 3 days so I'll let you decide if you need to go to all the work.  The pie itself was smooth with a crunchy sweet topping that made you want more.  Too bad I had to take for Thanksgiving so I couldn't eat all myself.  Just kidding.  I love sharing, that's why I am typing this right now.  Make sure you read all the way through the instructions before you begin.  I hope you like it too.
 
Pumpkin-Praline Pie
Prep Time: 30 minutes + chilling
Cook Time: 85 minutes
Yield: 8-10 servings

Ingredients:
1 (9-inch) pie shell, chilled in pie plate for 30 minutes
 
Pumpkin Filling:
1 (15 oz.) can pumpkin puree
¾ c. packed dark brown sugar
2 t. ground cinnamon
1 t. ground ginger
½ t. ground allspice
Pinch ground cloves
½ t. salt
1 c. evaporated milk
3 large eggs
2 t. vanilla extract

Praline Topping:
1 c. finely chopped pecans
1 t. vanilla extract
2 t. granulated sugar
2 t. dark corn syrup
½ c. packed dark brown sugar
Pinch salt
Directions:
1.      For the pie shell: Adjust oven rack to middle position and heat oven to 350°.  Line pie shell with foil, cover with 2 c. pie weights (pennies or dried beans are fine, too), and bake until dough under foil dries out, 20-25 minutes.  Remove foil and weights, poke crust several times with fork, and continue to bake until firmly set and lightly browned, 10 to 15 minutes.  Remove pie shell from oven (keep oven on) and set aside.  (Shell can be cooled, wrapped tightly in plastic, and stored at room temperature for 1 day.)

2.      For the filling: Puree pumpkin, brown sugar, spices, and salt in food processor until smooth, about 1 minute.  Cook mixture in large saucepan over medium-high heat until sputtering and thickened, about 4 minutes, and remove from heat.  Meanwhile, put pie shell back in oven to warm. 

 3.      Whisk evaporated milk into pumpkin mixture, then whisk in eggs and vanilla.  Pour filling into warmed pie shell and bake until filling is puffed and cracked around edges and center barely jiggles when pie is shaken, about 35 minutes.

4.      For the topping; While pie is baking, toss pecan, brown sugar, and salt in bowl.  Add corn syrup and vanilla, using fingers to ensure that ingredients are well blended. 

5.      Scatter topping evenly over puffed filling and sprinkle with granulated sugar.  Bake until pecans are fragrant and topping is bubbling around edges, about 10 minutes.  Cool pie completely on wire rack, at least 2 hours.  (Pie can be refrigerated for up to 2 days.)  Serve pie at room temperature. 

 (This recipe originally came from www.cookscountry.com )

Thursday, November 17, 2011

Blueberry Cheesecake

Cheesecake makes me happy.  All kinds of cheesecake.  But the one that makes me the happiest is the one I grew up with.  I wasn't introduced to New York style cheesecake until I was in high school and while I love that, I sometimes just want the light creamy texture of this cheesecake.  My mom would make this for my Dad's birthday and it was my favorite to dessert to make for a Sunday evening.  I remember asking for it for my birthday, but since I also wanted lasagna my Mom said that would be too much cheese.  Some years I got my wish, others I didn't.  But I don't think I ever stopped trying.  Now that I am in charge of my birthday dinners, we eat both.  You only get one birthday once a year after all.    This cheesecake is refreshing.  It's not as rich as New York style cheesecake so you have to be careful that you don't eat the whole pan.  You obviously don't have to use blueberry pie filling, you can use whatever you prefer.  I go back and forth between blueberry and cherry.  I hope you love it as much as my family does.  A word of advice – do not use Imperial margarine in your crust.  It has too much water in it so it makes your crust soggy...ick.  You can find Dream Whip in the cooking aisle usually on the top shelf above the jell-o.

Blueberry Cheesecake
Prep Time: 15 minutes
Cook Time: 3 minutes
Chilling Time: 2-4 hours
 
Ingredients:
CRUST:
1¼ c. graham cracker crumbs
¼ c. sugar
¼ c. softened margarine
 
FILLING:
2 (8 oz. Each) packages cream cheese, softened
1 c. sugar
2 envelopes Dream Whip
¾ c. milk
2 t. vanilla
Directions: For crust: Mix together the crumbs, ¼ c. sugar and margarine and press in a 9x13 pan.  Bake at 375° for 3 minutes.  Cool.  For filling: Whip the cream cheese with the 1 cup sugar in a large bowl.  In a medium bowl whip the Dream Whip with the ¾ c. milk and vanilla until mixture is stiff.  Mix the Dream Whip with the other mixture and spread over cooled crust.  Refrigerate until set.  Serve with pie filling of your choice. 

Monday, October 31, 2011

Crumb Topped Apple Pie

Apple pie, mmmm...Apple pie brings back so many memories for me. It is my mother's favorite dessert  and so we had it quite often.  The fact that we had the best apple tree in the backyard was also a factor in the frequency of the dessert.  I used to love sitting on the board as a counterweight to the apple-peeler-corer slicer and watch my mom get the apples ready for the pies plus we got to eat all the peels.  I suppose my mom could have used a clamp but I am glad she didn't because it was a good time to bond with mom.  This is not my mom's recipe which is perfect when you want an honest to goodness simple apple pie.  But this is a variation with a crumb topping that's gives you a little different texture.    Don't be stingy with the apples, they cook down.   As always apple pie is better warm and with ice cream. 

Crumb Topped Apple Pie
Prep Time: 45 minutes + chilling
Cook Time: 1 hour
Yield: 8 servings
Family Friendliness: Some kids like apple pie and some don't, that's all.

Ingredients:
1¼ c. all-purpose flour
½ t. salt
½ c. shortening
¼ c. cold water
FILLING:
5 large tart apples, peeled and thinly sliced
2/3 c. sugar
5 t. all-purpose flour
1¼ t. ground cinnamon
TOPPING:
2/3 c. all-purpose flour
½ c. sugar
¼ c. cold butter (don't use margarine it makes the crust super crunchy and hard to cut through) 
Directions: In a large bowl, combine flour and salt; cut in the shortening until crumbly.  Gradually add water, tossing with a fork until dough forms a ball.  Wrap in plastic wrap.  Refrigerate for 1 to 1½ hours or until easy to handle.  Roll out pastry to fit a 9-inch pie plate.  Transfer pastry to pie plate.  Trim pastry to ½ inch beyond edge of plate; flute edges.  For filling, place apples in crust.  Combine the sugar, flour and cinnamon; sprinkle over apples.  For topping, combine flour and sugar in a small bowl; cut in butter until crumbly.  Sprinkle over filling.  Bake at 450° for 10 minutes.  Reduce heat to 350°, bake 50-60 minutes longer or until topping is golden brown and filling is bubbly.  Cool on a wire rack.

 *Tip: Handle your pie crust as little as possible and don't let it sit for a long time or else your crust will be tough. 
 
(This recipe originally came from Taste of Home magazine)

Friday, October 14, 2011

Zucchini Cupcakes with Caramel Frosting

Got any more zucchini lying around?  I got this recipe from a lady at church, I wish I could remember which one, but I can’t.  I think these cupcakes are so scrumptious.  Anything with caramel is a winner in my book.  That’s all I have to say. 

Zucchini Cupcakes with Caramel Frosting
½ c. orange juice
3 eggs
1 and 1/3 c. sugar 
½ c. vegetable oil
1 t. almond extract
2½ c. flour
2 t. ground cinnamon
2 t. baking powder
1 t. baking soda
1 t. salt
½ t. ground cloves
1½ c. shredded zucchini

FROSTING:
1 c. brown sugar
½ c. butter
¼ c. milk
1 t. vanilla extract
1½ - 2 c. powdered sugar
Directions: In a mixing bowl, beat eggs, sugar, oil, orange juice and extract.  Combine dry ingredients; add to the egg mixture and mix well, add the zucchini.  Fill greased or paper-lined muffin cups 2/3 full.  Bake at 350˚ for 20-25 minutes or until cupcakes test done.  Cool for 10 minutes before removing to a wire rack.  For frosting, combine brown sugar, butter, and milk in a saucepan; bring to a boil over medium heat.  Cook and stir for 2 minutes.  Remove from the heat; stir in vanilla.  Beat in powdered sugar.  Frost.    

Tuesday, October 4, 2011

Chocolate Chip Zucchini Cake

This is another one of my favorite ways to use zucchini.  I got it from a church cookbook from back home.  Thank you Tammy Mar.  The warm gooey goodness of this cake with a scoop or two of vanilla ice cream just seems to melt away  the stresses of the day.  It is better to eat it right out of the oven or put a piece in the microwave for a few seconds, but always with ice cream.  If you're feeling like a little more sweetness use milk chocolate chips instead of semi-sweet.  I don't use nuts because I feel they get in the way of the gooey-ness.  Let me know if you like it!

Prep Time: 20 minutes
Cook Time: 40 minutes
Family Friendliness: Chocolate cake, really do you have to ask?

Chocolate Chip Zucchini Cake
Ingredients:
½ c. oil
1¾ c. sugar
1 t. vanilla
½ t. cinnamon
4 T. cocoa
½ c. sour milk (½ T. vinegar in a ½ c. measuring cup, then fill with milk, let sit for 5 minutes)
¼ c. margarine
2 eggs
2 c. grated zucchini
2½ c. flour
1 t. baking soda
½ t. salt

TOPPING:
1 (12 oz.) pkg. semi-sweet chocolate chips
½ c. chopped nuts (completely optional)
2 T. brown sugar
2 T. white sugar
Directions: Mix all cake ingredients together and pout into a greased and floured 9x13 pan.  Before baking, mix together topping ingredients.  Sprinkle on top of cake and bake at 350° for 40 minutes.  Serve with vanilla ice cream.


Wednesday, September 28, 2011

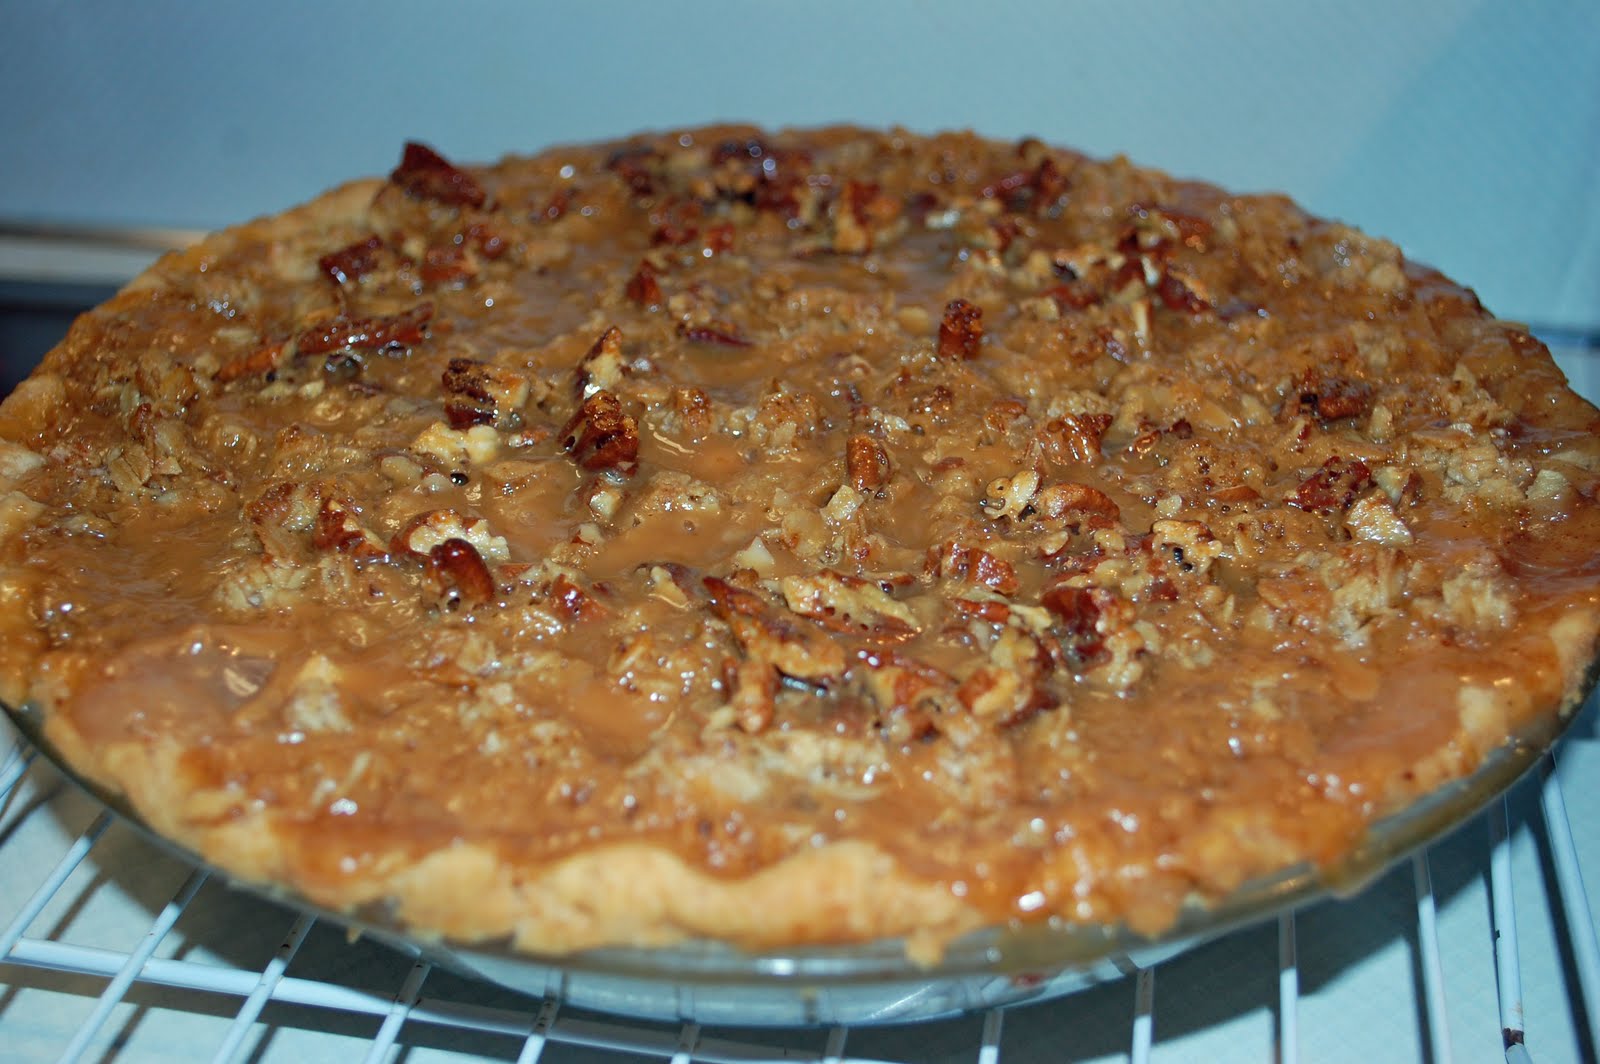
Caramel Pear Pie

Pears are in season right now and so yummy. I love to eat a fresh ripe pear. I have finished canning my bushel or so and now I am ready to put them to work in desserts. I made this pie Sunday night and it is so good. It’s a fun switch from apple. Pears are so delicious in pies and in desserts in general. Just a couple of notes, if you don’t have caramels, caramel ice cream topping would work just fine, just omit the milk. Also it says it takes about 6 medium pears to make 6 cups, well their idea of medium and my idea of medium must be different because it took me about 12 pears to get 6 full cups. Last, don’t forget to put a pan on the rack below the pie to catch any drips. I really do like this pie better cold than warm, which is strange for a cooked fruit pie. Look for pear dessert number 2 tomorrow.

Caramel Pear Pie
6 c. sliced peeled ripe pears (about 6 medium)
1 T. lemon juice
½ c. plus 3 T. sugar, divided
2 T. quick-cooking tapioca
¾ t. cinnamon
¼ t. salt
¼ t. nutmeg
1 unbaked pastry shell (9 in)
¾ c. old fashioned oats
1 T. flour
¼ c. cold butter or margarine
18 caramels
5 T. milk
¼ c. chopped pecans
Directions: In a large bowl, combine pears and lemon juice. In another bowl, combine ½ c. sugar, tapioca, cinnamon, salt and nutmeg. Add to pears; stir gently. Let stand for 15 minutes. Pour into pastry shell. In a bowl, combine the oats, flour and remaining sugar. Cut in butter until crumbly. Sprinkle over pears. Bake at 400° for 45 minutes. Meanwhile, in a saucepan over low heat, melt caramels with milk. (Faster in the microwave at 70% power) Stir often. Stir until smooth; add pecans. Drizzle over pie. Bake 8-10 minutes longer or until crust is golden brown and filling is bubbly. Cool on a wire rack (Better cold with whipped cream or cool whip.)